Enable Voice Interactions in the Web Channel
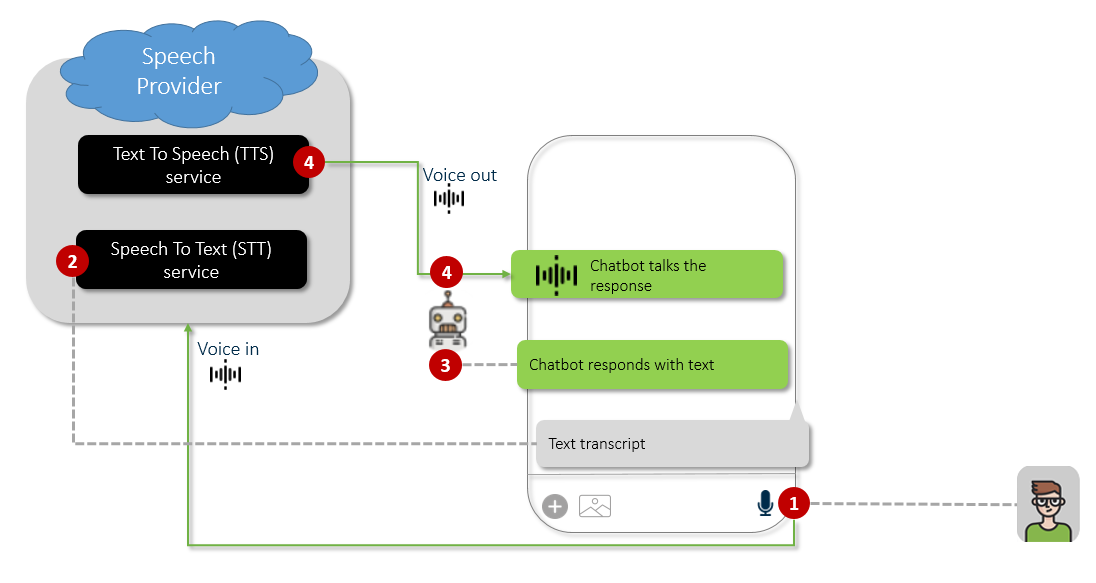
Druid enables seamless voice interactions within the WebChat channel, allowing users to switch from text to voice conversations using a microphone icon in the chat snippet.
Druid delivers Speech-to-Text (STT) and Text-to-Speech (TTS) functionality through integrations with industry-leading Technology Partners. Out-of-the-box support includes:
- Microsoft Cognitive Services
- ElevenLabs (TTS available starting with Druid 9.15 and STT available starting with Druid 9.18)
- Deepgram (STT only)
To integrate a preferred speech provider not listed above, please contact Druid Tech Support.
Enabling Voice Interactions
This topic explains how to configure speech providers to enable these capabilities.
Step 1: Configure Speech Providers for the Web channel
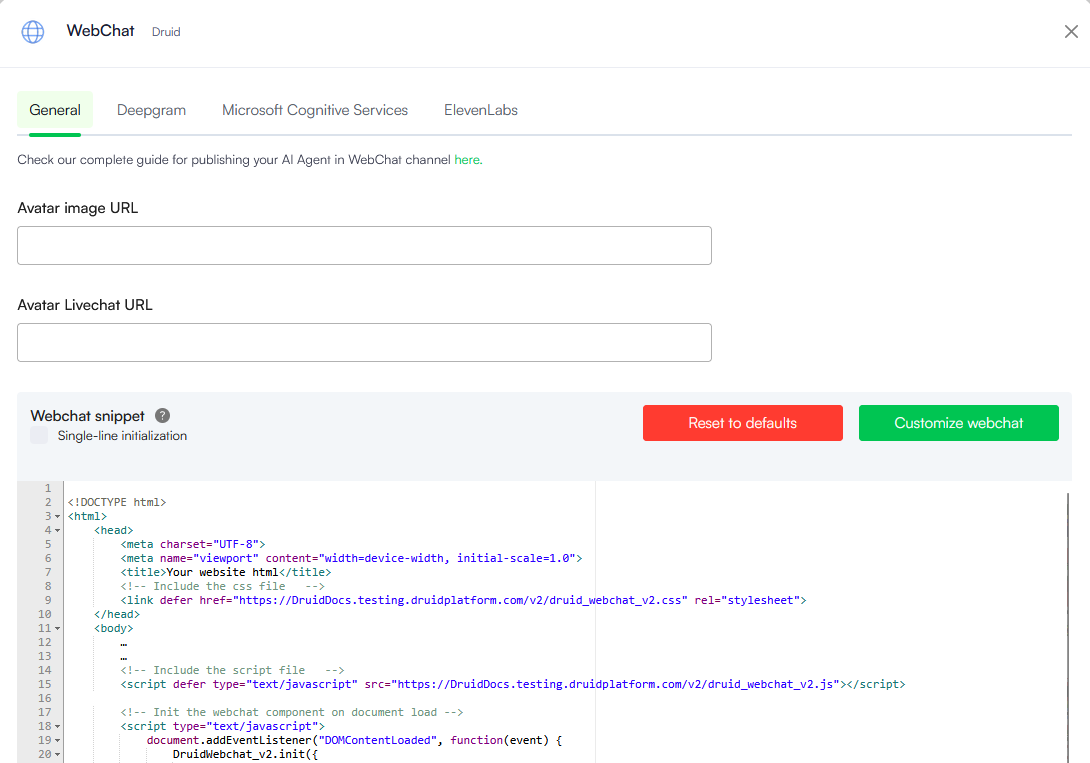
Voice interactions for the Web are configured directly within the WebChat channel settings:
- In the Druid Portal, navigate to your AI Agent and select the Channels tab.
- Search for 'webchat' and click on the WebChat card.
- At the top of the modal, click the tab for the speech provider you wish to configure.
- Configure the desired speech providers following the instructions in the subsequent sections.

The channel configuration modal opens.
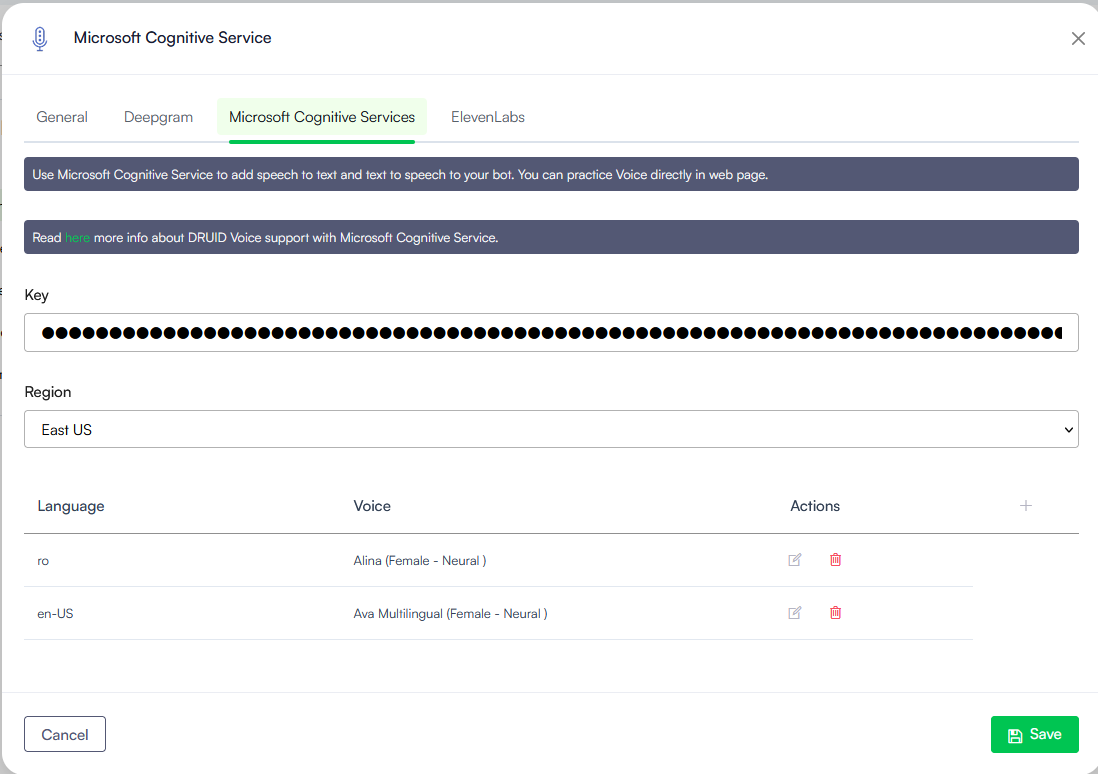
Setting up the Microsoft Cognitive Services
- In the channel configuration modal, click the Microsoft Cognitive Services tab.
- Provide the Key and Region provided by Druid Support Team in the voice activation email.
- Map the languages your AI Agent supports to specific voices in the configuration table.
- In the table below the Voice channel details, click the plus icon (+) to add a row.
- From the Language dropdown, select the AI Agent language (default or additional).
- From the Voice dropdown, select the specific voice the AI Agent will use to respond.
- Click the Save icon displayed inline.
- Save the configuration.
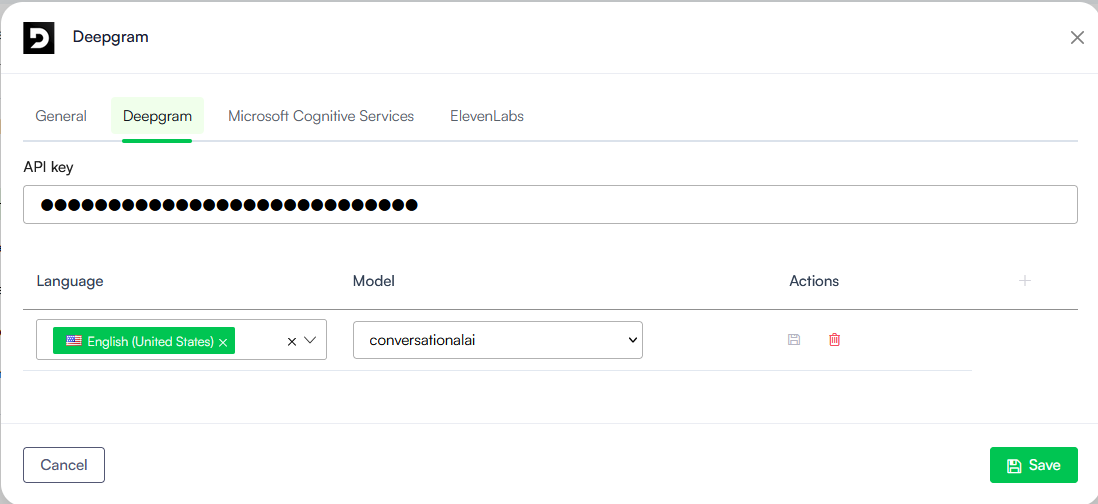
Setting up Deepgram
Prerequisites
- You need a Deepgram API Key with Member Permissions. Refer to Deepgram documentation (Token-Based Authentication) for information on how to create a key with Member permissions.
Setup procedure
- In the channel configuration modal, click the Deepgram tab.
- Enter your Deepgram API Key.
- Map the languages your AI Agent supports to specific Deepgram models in the configuration table.
- In the table, click the plus icon (+) to add a row.
- From the Language dropdown, select the AI Agent language (default or additional).
- From the Model dropdown, select the specific Deepgram model the AI Agent will use to respond.
- Click the Save icon displayed inline.
-
Save the configuration.
nova-2-medical). See Deepgram documentation for the complete list of models available.Setting up ElevenLabs
Druid supports ElevenLabs as a high-quality Text-to-Speech (TTS) and Speech-To-Text (STT) provider, enabling your AI Agent to communicate using specialized synthetic voices and custom voice clones.
Prerequisites
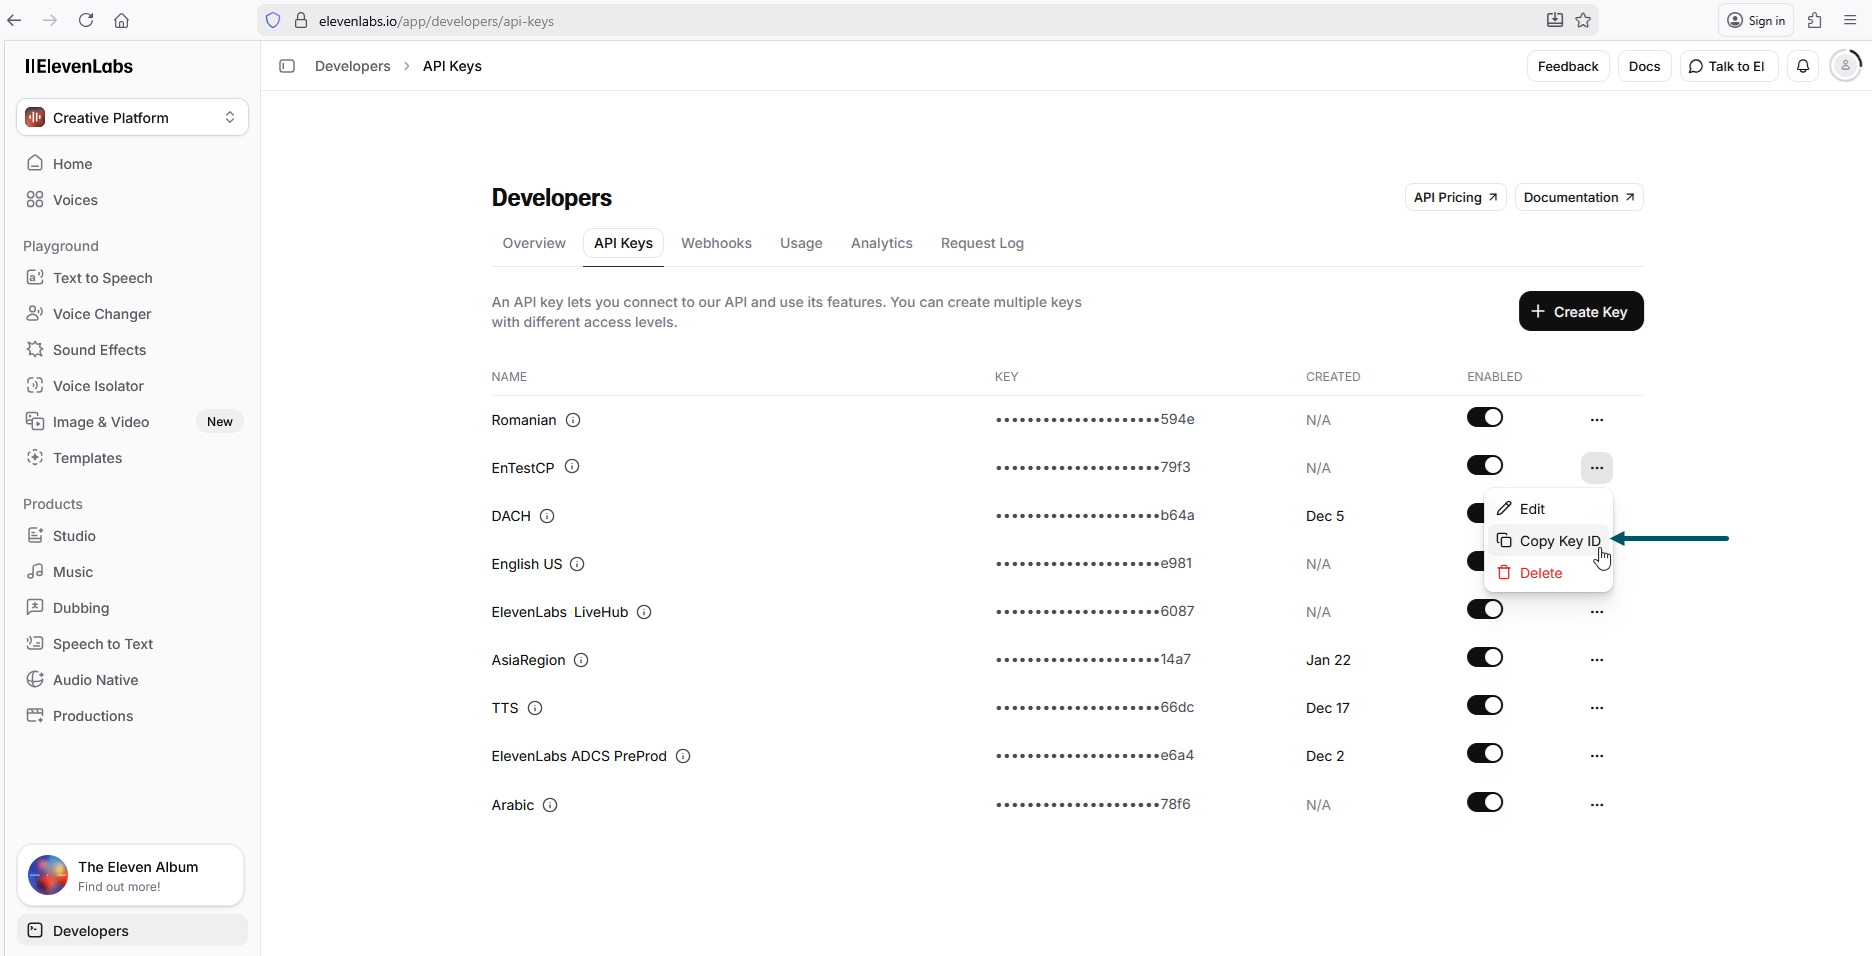
- You need an ElevenLabs API Key. To get API key, go to https://elevenlabs.io/app/developers/api-keys and copy the key ID.
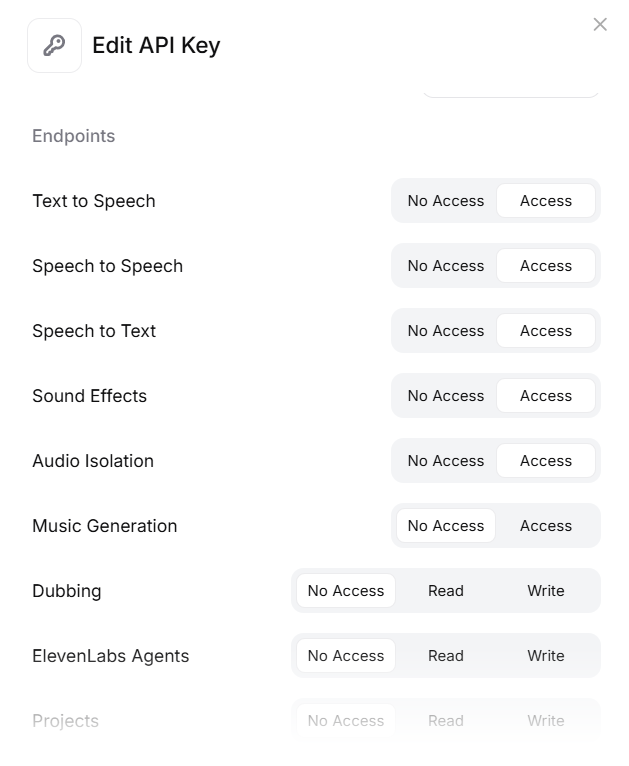
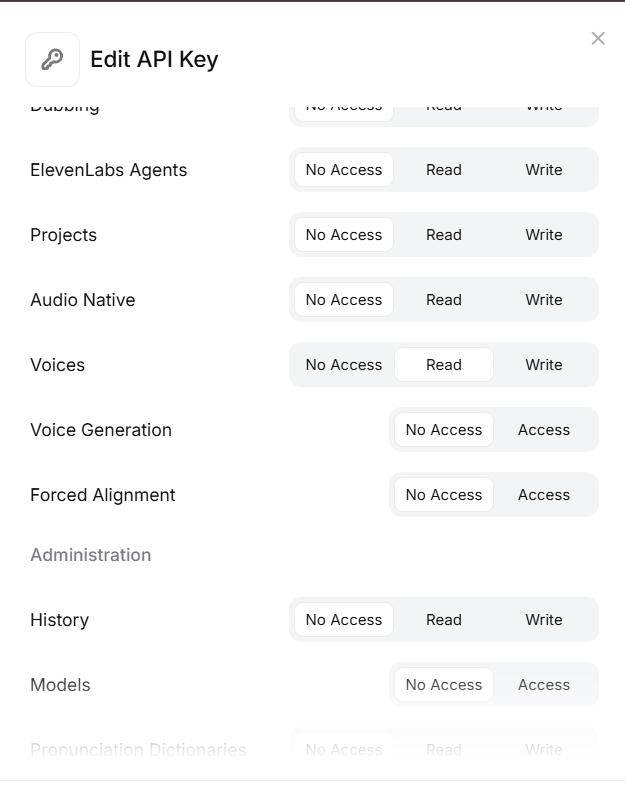
- Make sure to grant the API Key Read permissions for the following endpoints:
- Voices
- Text to Speech
- Speech to Speech
- Speech to Text (for STT support)
- Sound Effects
- Audio Isolation
Setup procedure
- In the channel configuration modal, click the ElevenLabs tab.
- Enter your ElevenLabs API Key.
- Map the languages your AI Agent supports to specific ElevenLabs languages in the configuration table.
- In the table, click the plus icon (+) to add a row.
- From the Language dropdown, select the AI Agent language (default or additional).
- From the Voice dropdown, select the specific ElevenLabs voice the AI Agent will use to respond. The model is automatically filled in after you select the voice.
- Click the Save icon displayed inline.
-
Click Save at the bottom of the page and close the modal.
Step 2. Enable the Speech Services
Once the speech provider details are entered, you must explicitly activate them for the channel:
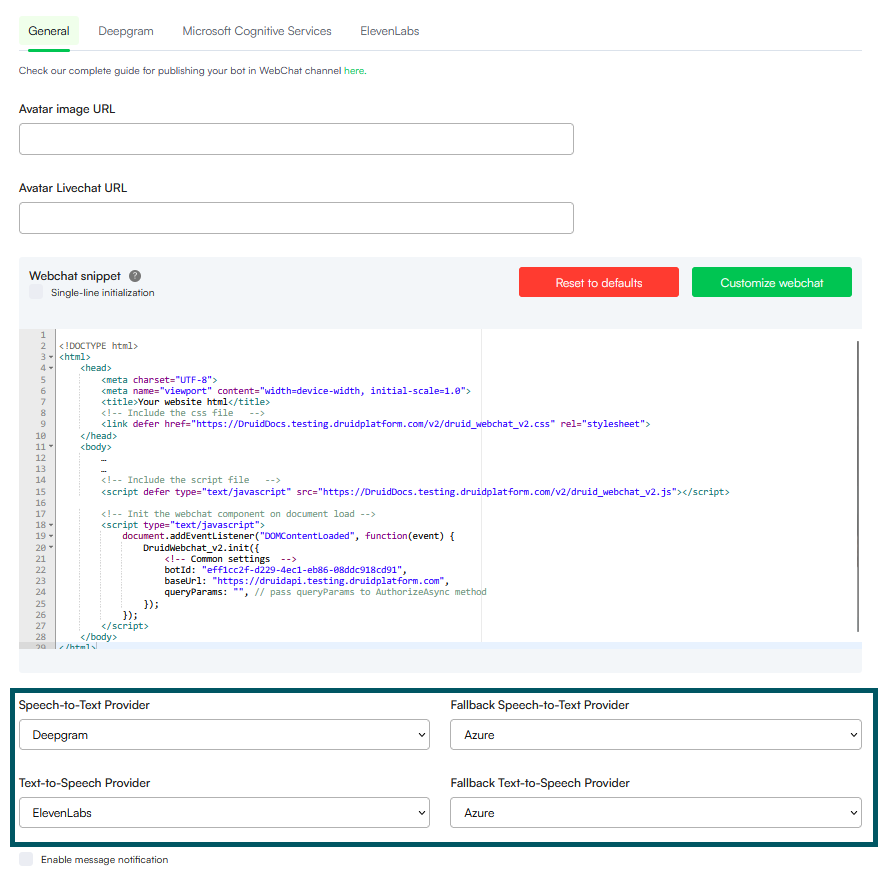
- In the WebChat configuration modal, click the General Tab and scroll-down at the bottom of the modal.
- Select the primary Speech-to-Text Provider. If you select a provider other than Azure, you should also select a Fallback Speech-to-Text Provider. The fallback speech provider will be used automatically if primary speech provider does not support the user’s language. In Druid 9.18, you can also select both Azure and ElevenLabs as STT fallback provider.
- Select the primary Text-to-Speech Provider. If you select ElevenLabs, you should also select Azure as a Fallback Text-to-Speech Provider. Azure will be used automatically if ElevenLabs does not support the user’s language.
- Click Save and close the modal.
Step 3: Authoring for Voice (optional)
To ensure a high-quality voice experience, use the Voice section in your flow steps and enter the message for voice in the Speak message field
-
The Speak message field takes priority over the standard text message when the voice interaction is active.
-
Use short, concise sentences and proper punctuation to improve the natural flow of the synthetic voice.

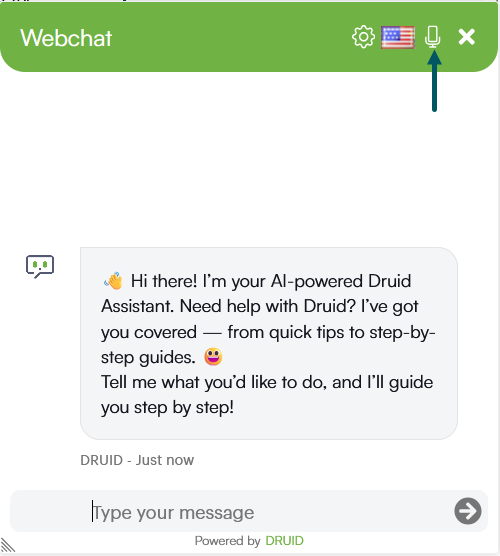
User Experience
Once speech services are enabled, a microphone icon automatically appears in the WebChat snippet. This allows users to switch from text to voice conversations seamlessly, enabling natural vocal interaction with the AI Agent.
- Speech-To-Text: When the user clicks the microphone and speaks, their voice is processed, and a real-time transcript appears in the input area.
- Text-To-Speech: When the AI Agent responds, the text is converted to audio and played back to the user automatically.